As a new parent, one of the first things you’ll need to set up is a bassinet. A bassinet is a small, cozy sleeping space for your newborn that’s designed to be safe and comfortable.
In this article, we will discuss how to put a bassinet together, ensuring it’s properly assembled for the safety and comfort of your little one.
Preparing for and assembling a bassinet might seem a bit daunting, but trust me, it’s not as difficult as it may seem. Despite the numerous styles and types of bassinets available, the process typically follows some simple steps.
I’ll guide you through this process, providing advice and important safety checks along the way.
Key Takeaways
- Understand the various types of bassinets to choose the right one for your needs
- Gather essential tools and follow pre-assembly preparations to ensure a smooth process
- Double-check safety aspects after assembly, and maintain your bassinet for future use
How to Put a Bassinet Together
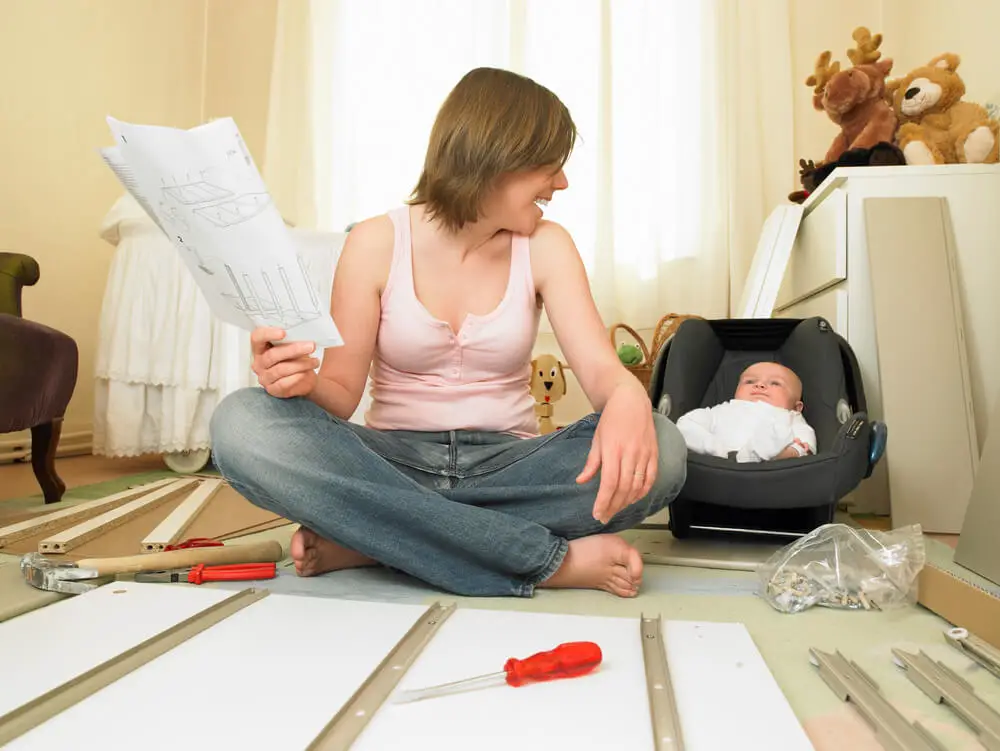
A bassinet is an essential bed for newborns to sleep in during their first few months. As a functional piece of furniture available in various designs and types, it’s important to be knowledgeable and confident when putting it together.
This section will discuss several aspects of bassinets, such as their basic design, types, and benefits for your nursery.
Bassinets are specifically designed to provide a safe, cozy sleeping space for newborns and babies up to around six months old. Generally, they are smaller and more portable than a full-sized crib, making them perfect for parents who want their baby close by while they sleep.
The compact size of a bassinet also makes it ideal for smaller nurseries, allowing you to maximize limited space.
There is a wide variety of bassinet types available, each with their own unique features and benefits.
For example, some bassinets come equipped with wheels or a rocking base for gentle movement, while others have built-in storage compartments to keep essentials nearby.
Additionally, bassinets can be free-standing or designed to attach directly to your bed, providing a cozier and convenient sleep solution for both you and your baby.
When selecting a bassinet design, it is important to consider factors such as your baby’s age, weight, and personal preferences to ensure that the chosen bassinet will be a practical and user-friendly addition to your nursery.
Bassinets are an essential bed for newborns, providing a safe and comfortable sleeping space during their first few months.
Choosing the Right Bassinet

When I was on the lookout for the perfect bassinet, I had several factors in mind. The size, portability, and safety features were among the top considerations. Having casters made it even more appealing as it enabled easy movement around the house.
In this section, I will share my experience and knowledge, so you can confidently choose an apt bassinet for your little one.
Size played a crucial role in my decision-making process. I wanted a bassinet that wouldn’t take up too much space yet provided a comfortable sleeping arrangement for the baby.
Do measure your room and take into account not only the dimensions of the bassinet but also some extra space for you to maneuver around it.
In terms of portability, I found that some bassinets come with casters or wheels, making it convenient to move the bassinet from one room to another. This feature was particularly helpful when I needed to bring the baby closer to me while I was working or resting in another room.
Nevertheless, ensure that the casters come with a locking mechanism so the bassinet remains stationary and safe when you want it to be.
The safety of my baby was paramount when choosing a bassinet. I made sure to look for bassinets that met current safety standards. A safe bassinet would have a sturdy frame, no rough edges or protruding parts, and breathable mesh sides that prevent the risk of suffocation.
Also, the mattress should be firm, flat, and fit snugly within the bassinet.
Price was another factor that helped me narrow down my options. I aimed for an affordable bassinet that offered good value for money. Setting a reasonable budget, I was able to find a bassinet that catered to my requirements without breaking the bank.
Considering these aspects, such as size, portability, casters, safety features, and price, I was successful in finding a bassinet that not only met my needs but was also a safe and comfortable sleeping environment for my precious little one.
Assemble Essentials
Before I begin assembling the bassinet, I make sure to gather all the necessary tools and equipment. This helps me avoid disruptions and streamline the process.
The essential tools and equipment include:
- Assembly instructions: A crucial part of a smooth assembly process. I follow the instructions provided by the manufacturer step by step.
- Screwdriver: A standard tool for putting together furniture items. I use a Philips-head or flat-head screwdriver based on the screws included in the package.
- Screws and Nails: Essential components that hold everything together. Typically, the screws and nails come with the bassinet, but I make sure to check they are the correct size and type as specified in the assembly instructions.
- Additional equipment: Depending on the bassinet model, I may need extra tools, such as a wrench or a drill. I review the assembly instructions to determine any specific equipment requirements.
Once I have these essentials organized, I lay out the bassinet parts in the designated assembly area. This helps me maintain a clutter-free workspace and quickly identify each piece as I proceed with the assembly.
Pre-Assemble Preparations
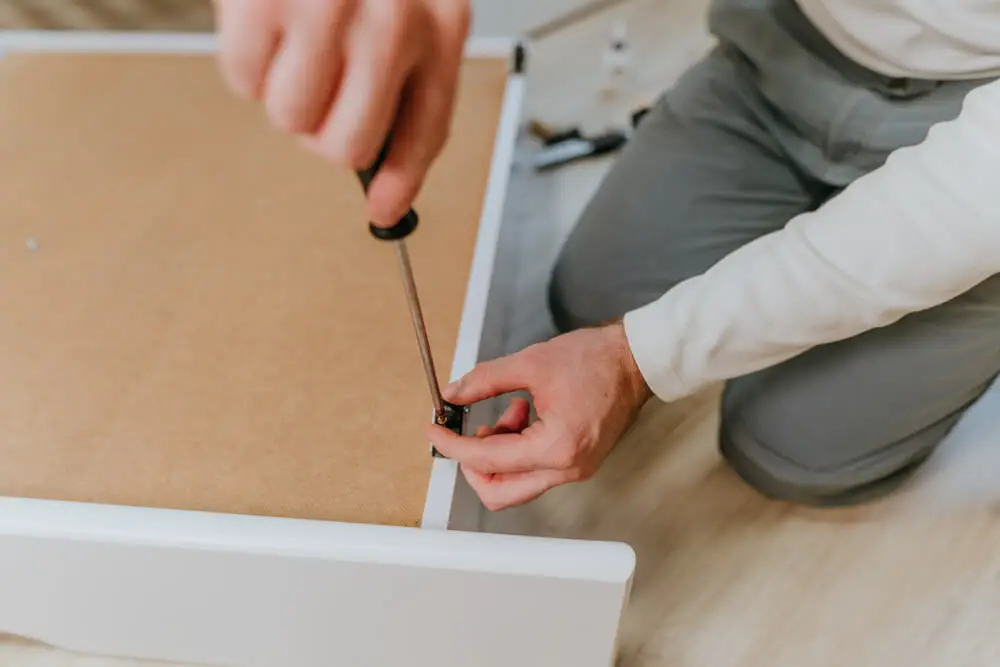
Before I begin assembling the bassinet, I like to make sure all of the necessary parts are accounted for, and my workspace is clean and organized. This will make the process smooth and easy to manage.
As safety is a top priority, I want to ensure each part of the bassinet is in good condition, with no visible defects or damage that might compromise its stability.
I start by laying out all of the bassinet parts on a flat, clean surface to make it easy to identify and reach the components as I need them throughout the assembly process.
It’s essential to have the manufacturer’s instructions handy, as they will offer specific guidance on what should be included in the bassinet package and provide step-by-step instructions for the assembly.
During the pre-assembly preparations, it’s important to focus on the bassinet’s comfort and safety features. I always make sure to have a firm, well-fitting mattress, as this will ensure my baby has a cozy and secure sleep environment.
The bassinet should have a fitted sheet that fully covers the mattress, keeping it clean and snug.
In addition to comfort, ensuring the bassinet has all of its safety elements intact is critical. I always double-check that there are no gaps or openings that could pose a risk to my baby and that the hardware, such as screws and bolts, is secure.
To enhance the bassinet’s safety, I pay close attention to how the side coverings are attached, making sure they will provide proper air circulation while still keeping my baby secure.
Taking the time to properly prepare for bassinet assembly contributes to a satisfying experience and ultimately results in a safe, comfortable, and aesthetically pleasing sleep environment for my baby.
With all components available and in tip-top shape, I can put them together with confidence, ensuring every part is secure and optimally placed for my baby’s comfort and safety.
Step-by-Step Assembling
Assembling a bassinet can seem daunting, but I assure you that with this easy-to-follow step-by-step guide, you will confidently set up a safe and comfortable sleeping space for your baby.
Firstly, I laid out all the components of the bassinet, making sure they were all present and in good condition. It’s important to follow the manufacturer’s instructions closely, as different bassinets have unique assembly methods.
Next, I assemble the frame of the bassinet. To do this, I connect each piece together, ensuring they align correctly and securely snap into place. I pay extra attention to the legs or stand of the bassinet, as they must be stable and strong to support the baby’s weight.
Once the frame is assembled, I move on to attaching the bassinet bed or basket onto the stand. While some models might require a screwdriver for this step, others might have a simple click or snap mechanism.
I carefully follow the instructions and ensure that the bed is fastened to the frame.
After securing the bassinet bed to the stand, I proceeded to install any other necessary components, such as a canopy, storage basket, or wheels. With these elements in place, the bassinet begins to take shape, and I get closer to completing the assembly process.
Lastly, I carefully place the mattress and bedding into the bassinet, making sure they fit snugly to provide a comfortable and safe sleeping environment. I double-check all connections, screws, and bolts to ensure the bassinet is sturdy and secure.
Though assembling a bassinet may initially appear complex, breaking down the process into a simple step-by-step guide makes it much more manageable.
Finalizing Your Assembly

Now that the main structure of the bassinet is assembled, it’s time to focus on the final touches. I’ll guide you through this last part of putting your bassinet together.
First, I’ll secure any remaining screws and nails to ensure the bassinet is stable and safe. It’s important to double-check that all screws are tightly fastened and no nails are sticking out.
Next, I’ll attach the hood to the bassinet, carefully aligning it with the designated slots or brackets. Once it’s in place, I’ll ensure it’s securely fastened and can be adjusted smoothly.
It’s time to add the mobile, which usually hangs above the sleeping area. I’ll follow the specific instructions provided by the manufacturer to attach it properly, making sure it’s secure and out of reach from the baby.
Once that’s done, I’ll prepare the bedding by laying down a fitted sheet on the mattress. It’s essential to choose a tight-fitting, breathable sheet to prevent any risk of suffocation. I’ll also place a liner around the bassinet to provide added comfort, making sure it’s the correct size and securely attached.
Lastly, I’ll add any additional accessories that came with the bassinet, such as attachable storage compartments or built-in nightlights. These accessories can provide extra functionality and convenience for both the baby and the parents.
In the end, assembling the bassinet required precision and attention to detail. By following the provided guidelines and using the appropriate tools, I successfully put together a safe and comfortable sleeping space for the baby.
Safety Checks

Before assembling the bassinet, it’s crucial to ensure all the necessary safety checks are considered. First, I always verify that all the parts and hardware are present and in good condition. Damaged or missing parts can compromise the bassinet’s stability and safety.
When assembling the bassinet, I make sure to follow the manufacturer’s instructions carefully. This ensures that the bassinet is put together correctly, providing a secure and stable space for the baby to sleep.
It’s important to regularly check the bassinet’s assembly after use, ensuring that all screws and bolts are tightly secured.
Choosing the right mattress is vital for the baby’s comfort and safety. I always opt for a firm, flat mattress that fits snugly within the bassinet. There should be no gaps between the mattress and the sides of the bassinet, as these could pose a suffocation risk.
Once the bassinet is assembled, I give the stand a thorough inspection. A solid surface is essential for stability, so I always make sure the bassinet is placed on a flat, even floor.
I test the strength and durability of the stand by gently pushing and pulling on it, checking for any wobbling or signs of instability.
Safety isn’t just about the physical aspect of the bassinet; it’s also essential to consider the age limit and weight restrictions specified by the manufacturer. I always ensure that I’m aware of these limits so that my baby is safely accommodated in the bassinet.
Diligently following these safety checks during and after assembly can rest assured knowing that my baby will be sleeping securely and comfortably in their bassinet.
After Assembly Tips
Once I’ve put together my bassinet, it’s important to keep a few things in mind to ensure maximum safety, comfort, and portability for my baby.
First, to create a comfortable sleeping environment, I always make sure the bassinet has a snug and fitted cover. This helps reduce the risk of loose bedding that could potentially cause hazards during sleep. I avoid using fluffy pillows or heavy blankets inside the bassinet, as these can pose suffocation risks to my baby.
When choosing the location for my bassinet, I pick a spot that is away from windows, drafts, and heating or cooling sources. By doing so, I maintain a consistent room temperature, which is crucial for my little one’s comfort and safety.
If my bassinet has wheels, I always ensure they’re locked when the bassinet is not being moved. This keeps the bassinet stable and safe while my baby rests. In times when portability is required, I unlock the wheels and move the bassinet to another location in my home, allowing me to keep a close eye on my baby.
In line with safety recommendations, I avoid attaching any toys or decorations directly to the bassinet as they could pose a risk to my child. Instead, I place these items at a safe distance for my baby to enjoy them visually without any potential harm.
Regularly checking the hardware and maintenance of my bassinet is a must. I make sure there are no loose screws that could compromise its structural integrity. If necessary, I tighten any hardware that appears loose or unstable.
By following these tips, I can ensure my bassinet is a safe, comfortable, and portable environment for my little one.
Maintenance and Care
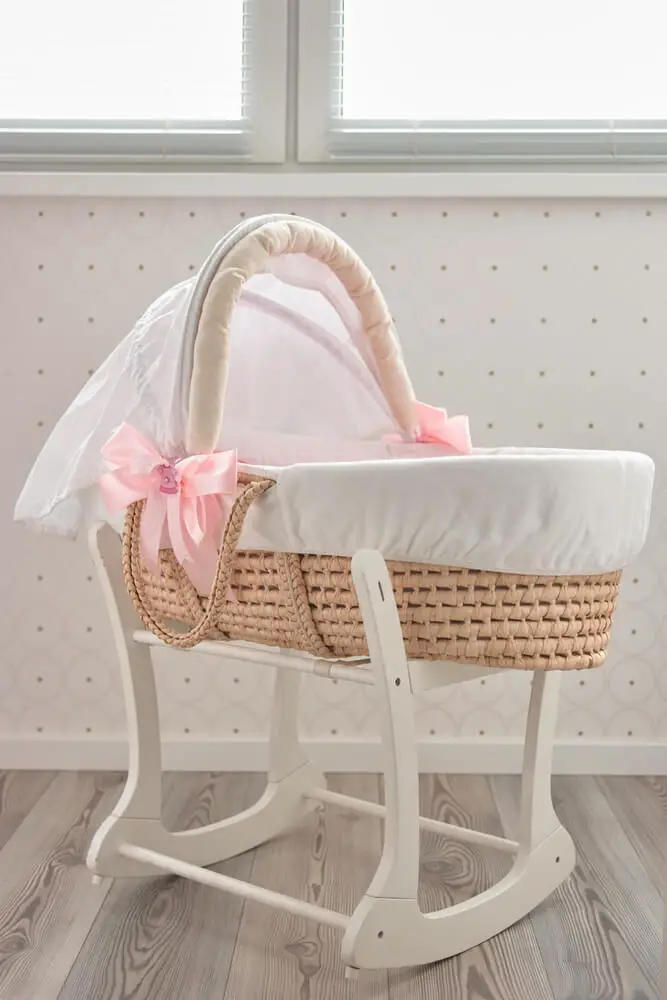
I believe that taking care of a bassinet and its components is an essential part of ensuring your baby’s safety and comfort. Here’s a guide on how to properly maintain and care for a bassinet, its mattress, and associated accessories.
First, I recommend cleaning the bassinet frame regularly. Gently wipe it down with a damp cloth and mild soap, and allow it to air dry. This will help keep the bassinet free from dust, dirt, and allergens. While you’re at it, check for any loose screws or damaged parts, and address any issues immediately.
When it comes to the bassinet mattress, always use a waterproof mattress cover. This will protect the mattress from any spills, leaks, or accidents. Wash the mattress cover routinely, following the manufacturer’s instructions.
You can also give the mattress a gentle cleaning by vacuuming it or spot-cleaning stains with a damp cloth and mild soap. Be sure the mattress is completely dry before returning it to the bassinet.
For the bassinet sheets, I advise having at least two sets so that one can be used while the other is being washed. This way, you’ll always have a clean bassinet sheet on hand. Wash the sheets frequently in warm water and mild detergent, and dry them according to the manufacturer’s instructions.
A clean sheet will provide a comfortable sleeping environment for your baby.
It’s essential to inspect all components of the bassinet regularly for any signs of wear and tear. Look for any rips or tears in the sheets, mattress cover, or bassinet fabric. If any of these items are damaged, replace them immediately to ensure your baby’s safety.
Following these maintenance and care practices will help you keep your bassinet in optimal condition, providing a safe and comfortable sleeping space for your baby.
In Conclusion
Assembling a bassinet may seem like a daunting task, but with a clear understanding of the process, I find it to be quite manageable. It’s important to remember that the primary objective is to create a safe and comfortable sleeping environment for a newborn.
First, I ensure all the parts are accounted for and that I have the necessary tools for assembly. This can include a screwdriver, an Allen wrench, or other provided tools. I then carefully follow the manufacturer’s instructions, taking care to not overtighten screws or force parts together.
Throughout the assembly process, I pay close attention to the stability of the bassinet. It’s crucial that it remains firm and secure, as this will directly affect the safety of the sleeping newborn. Additional features like mesh walls and adjustable features add to the overall comfort and safety of the bassinet.
Lastly, as I put the finishing touches on the bassinet, I make sure that all bedding materials are properly fitted and in place. This ensures the utmost comfort for the baby and promotes a peaceful sleep environment.
By following these steps and maintaining a confident and knowledgeable approach, I successfully assembled a bassinet that provides both safety and comfort for my newborn.
Frequently Asked Questions
How to assemble a bassinet step by step?
To assemble a bassinet, first, unpack all the parts and check if everything is included. Then, start by connecting the base and support bars, followed by attaching the legs or wheels as per the manufacturer’s instructions.
Next, secure the mattress board and place the mattress pad in position. Finally, attach any side panels, canopy, or additional features as instructed. It’s helpful to have the manual nearby for reference.
What tools are needed for bassinet assembly?
Usually, bassinet assembly requires minimal tools. In most cases, a screwdriver, wrench, or Allen key is sufficient. Some bassinets even come with the required tools included. Be sure to check the manual to see if additional tools are needed.
Are there any specific safety guidelines for putting a bassinet together?
Safety is crucial during bassinet assembly. Follow the manufacturer’s instructions closely to ensure the bassinet is assembled correctly. Pay special attention to attaching each component securely and double-check your work. Ensure the mattress is firm and fits snugly within the bassinet without gaps, which will reduce the risk of suffocation.
How to adjust the height of a bassinet?
To adjust the height of a bassinet, locate the adjustment mechanism, typically located under the bassinet or on the support bars. Loosen or release the lock, adjust the height to the desired level, and then tighten or relock the mechanism. Make sure the bassinet is level and stable before use.
What are the common issues faced during bassinet assembly?
Common issues during bassinet assembly include missing parts, difficulty positioning components, and unclear instructions. To troubleshoot these issues, double-check the manual and contents of the package, consult the manufacturer’s customer support, or search online for tutorials.
Additionally, enlisting the help of another person can make assembly easier and more efficient.
How to convert a 2-in-1 bassinet and bedside sleeper?
To convert a 2-in-1 bassinet and bedside sleeper, first consult the user manual for specific instructions. Generally, the process involves removing or lowering one or more of the side panels, adjusting the height of the bassinet to match the bedside, and securing a strap attachment to the adult bed for stability.
After making the necessary adjustments, ensure the 2-in-1 is stable and secure before use.


